Building a Messaging UI with Tabs, Sidebar, and Message View
This guide walks you through creating a tab-based messaging UI using React and CometChat UIKit. The UI will include different sections for Chats, Calls, Users, and Groups, allowing seamless navigation.
User Interface Preview
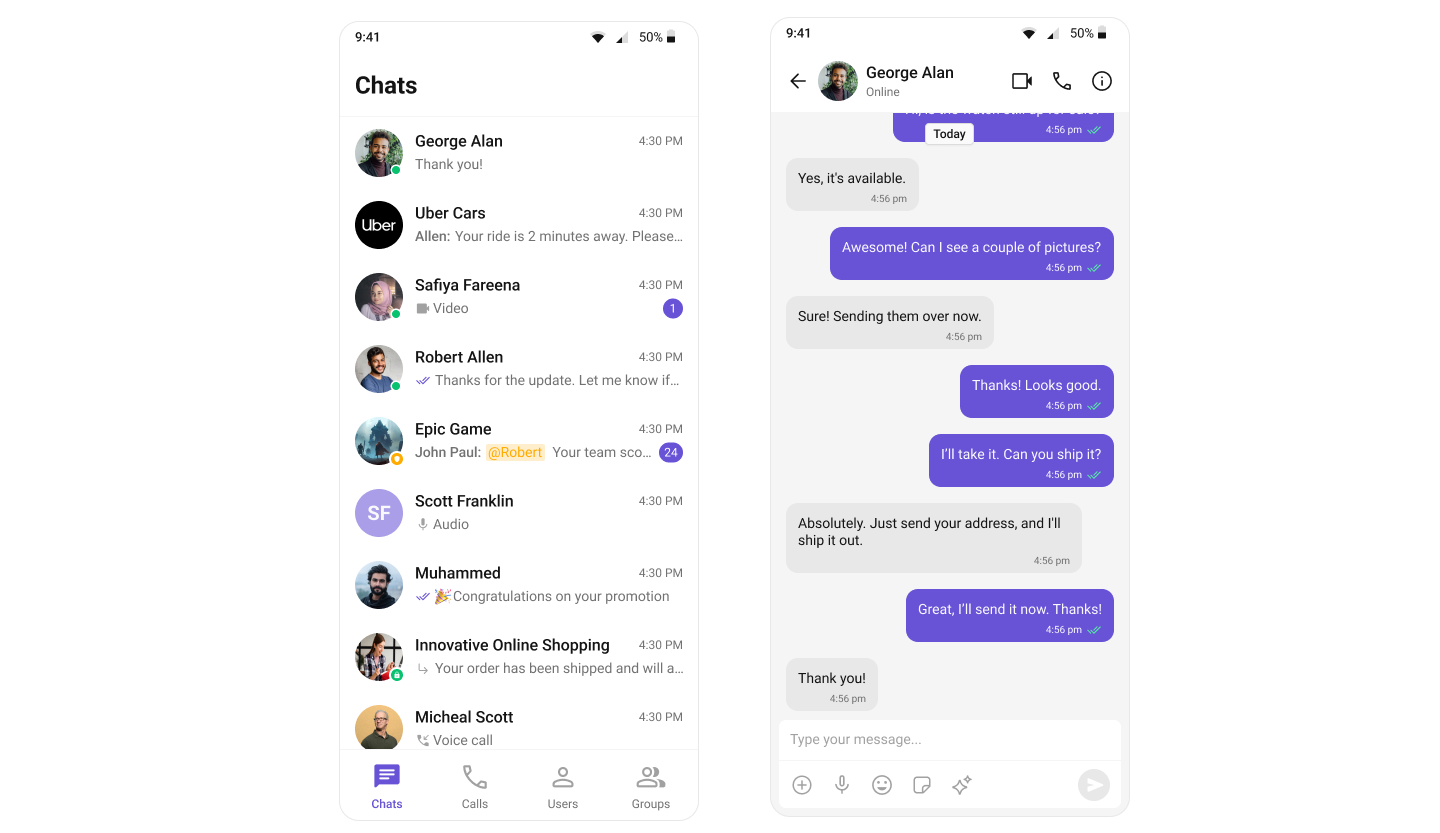
This layout consists of:
- Sidebar (Conversation List) – Displays recent conversations with active users and groups.
- Message View – Shows the selected chat with real-time messages.
- Message Input Box – Allows users to send messages seamlessly.
Step 1: Render the Tab Component
The CometChatConversations widget displays all conversations related to the currently logged-in user. Follow the steps below to render this component:
Widget build(BuildContext context) {
return Scaffold(
appBar: CometChatMessageHeader(
user: widget.user,
group: widget.group,
),
body: SafeArea(
child: Column(
children: [
Expanded(
child: CometChatMessageList(
user: widget.user,
group: widget.group,
),
),
CometChatMessageComposer(
user: widget.user,
group: widget.group,
),
],
),
),
);
}
Full Example: main.dart
import 'package:flutter/material.dart';
import 'package:cometchat_chat_uikit/cometchat_chat_uikit.dart';
import 'package:cometchat_calls_uikit/cometchat_calls_uikit.dart'; //Optional: Include if you're using Audio/Video Calling
import 'messages_screen.dart';
import 'cometchat_config.dart';
void main() => runApp(const MyApp());
class MyApp extends StatelessWidget {
const MyApp({super.key});
Widget build(BuildContext context) {
return MaterialApp(
title: 'CometChat UI Kit',
theme: ThemeData(
colorScheme: ColorScheme.fromSeed(seedColor: Colors.deepPurple),
useMaterial3: true,
),
home: const Home(),
);
}
}
class Home extends StatelessWidget {
const Home({super.key});
Future<void> _initializeAndLogin() async {
final settings = UIKitSettingsBuilder()
..subscriptionType = CometChatSubscriptionType.allUsers
..autoEstablishSocketConnection = true
..appId = CometChatConfig.appId
..region = CometChatConfig.region
..authKey = CometChatConfig.authKey
..extensions = CometChatUIKitChatExtensions.getDefaultExtensions() //Replace this with empty array, if you want to disable all extensions
..callingExtension = CometChatCallingExtension(); //Optional: Include if you're using Audio/Video Calling
await CometChatUIKit.init(uiKitSettings: settings.build());
await CometChatUIKit.login(
'cometchat-uid-1',
onSuccess: (_) => debugPrint('✅ Login Successful'),
onError: (err) => throw Exception('Login Failed: $err'),
);
}
Widget build(BuildContext context) {
return FutureBuilder<void>(
future: _initializeAndLogin(),
builder: (ctx, snap) {
if (snap.connectionState != ConnectionState.done) {
return const Scaffold(
body: SafeArea(
child: Center(child: CircularProgressIndicator()),
),
);
}
if (snap.hasError) {
return Scaffold(
body: SafeArea(
child: Center(
child: Text(
'Error starting app:\n${snap.error}',
textAlign: TextAlign.center,
),
),
),
);
}
return const TabsScreen();
},
);
}
}
class TabsScreen extends StatefulWidget {
const TabsScreen({super.key});
State<TabsScreen> createState() => _TabsScreenState();
}
class _TabsScreenState extends State<TabsScreen> {
int _selectedIndex = 0;
final PageController _pageController = PageController();
void _onItemTapped(int index) {
setState(() {
_selectedIndex = index;
});
_pageController.jumpToPage(index);
}
Widget build(BuildContext context) {
return Scaffold(
body: PageView(
controller: _pageController,
onPageChanged: (index) {
setState(() {
_selectedIndex = index;
});
},
children: [
CometChatConversations(
showBackButton: false,
onItemTap: (conversation) {
Navigator.push(
context,
MaterialPageRoute(
builder: (context) => MessagesScreen(
user: conversation.conversationWith is User
? conversation.conversationWith as User
: null,
group: conversation.conversationWith is Group
? conversation.conversationWith as Group
: null,
),
),
);
},
),
CometChatCallLogs(),
CometChatUsers(),
CometChatGroups(),
],
),
bottomNavigationBar: BottomNavigationBar(
currentIndex: _selectedIndex,
onTap: _onItemTapped,
items: const [
BottomNavigationBarItem(
icon: Icon(Icons.chat),
label: "Chat",
),
BottomNavigationBarItem(
icon: Icon(Icons.call),
label: "Calls",
),
BottomNavigationBarItem(
icon: Icon(Icons.person),
label: "Users",
),
BottomNavigationBarItem(
icon: Icon(Icons.group),
label: "Groups",
),
],
),
);
}
}
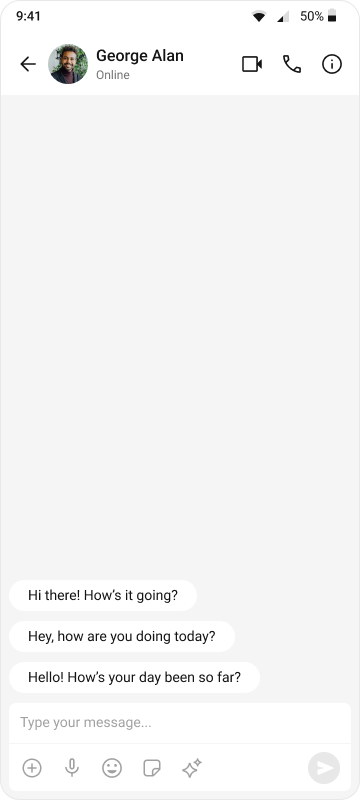
Step 2: Render the Messages Component
To create a complete messaging view, include the following components in messages_screen.dart:
import 'package:flutter/material.dart';
import 'package:cometchat_chat_uikit/cometchat_chat_uikit.dart';
class MessagesScreen extends StatefulWidget {
final User? user;
final Group? group;
const MessagesScreen({Key? key, this.user, this.group}) : super(key: key);
State<MessagesScreen> createState() => _MessagesScreenState();
}
class _MessagesScreenState extends State<MessagesScreen> {
Widget build(BuildContext context) {
return Scaffold(
appBar: CometChatMessageHeader(
user: widget.user,
group: widget.group,
),
body: SafeArea(
child: Column(
children: [
Expanded(
child: CometChatMessageList(
user: widget.user,
group: widget.group,
),
),
CometChatMessageComposer(
user: widget.user,
group: widget.group,
),
],
),
),
);
}
}
Step 3: Run the App
Use the following command to run the app on a connected device or emulator:
flutter run
This will launch the app, and you should see the tab-based chat experience with the sidebar and message view. You can navigate between different tabs (Chats, Calls, Users, and Groups) and interact with the messaging features seamlessly.
Next Steps
Enhance the User Experience
- Advanced Customizations – Personalize the chat UI to align with your brand.